How do I setup Outlook for Office 365?
You may use Outlook to connect to Office 365 for your email and calendar if you prefer its interface. Outlook can be used on-campus or off-campus. The following steps are written presuming Outlook 2013.
Make sure Outlook is closed before attempting this procedure.
If you had Outlook previously configured on this Windows computer:
Open the Control Panel on your computer by going to the Start menu and clicking Control Panel.

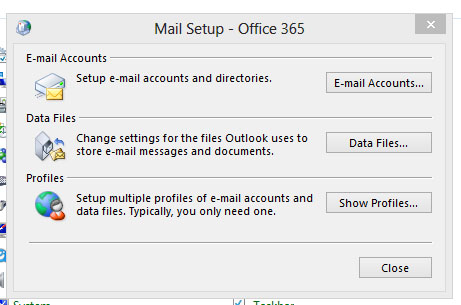
Click on the link labeled "Mail" to open the mail settings. (You may have to switch from category view to icon view or do a search in the top-right corner of this window.)

Click the 'Show Profiles...' button.

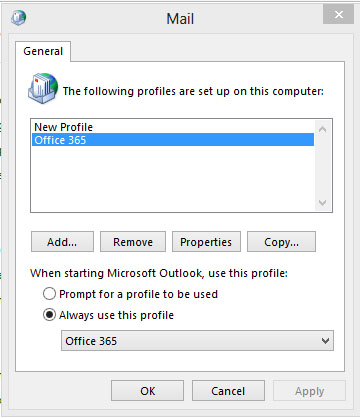
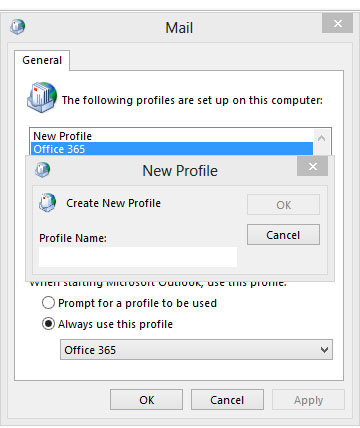
In the General tab, click Add... to add a new profile.

Enter a descriptive profile name such as Office365.

In the 'Add a New Account' window that appears, enter the required fields such as your email address and password when prompted and follow the on-screen directions to add your account.

The computer will now configure your mail server settings for you. After this is complete, click finished.

The configuration window will close and you can then click OK.

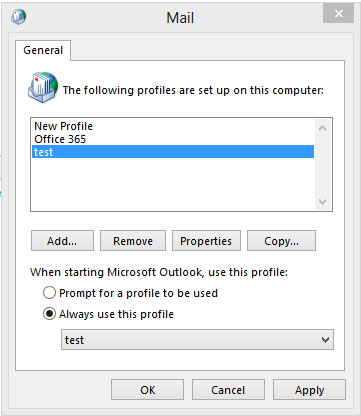
Back at the Control Panel Mail window, select the radio button that says 'Always use this profile' and choose from the drop-down the name of the profile you just created. Finally, click Ok.
Your mail account is now setup and ready to be opened in Outlook.
If this is the first time you are configuring Outlook:
- Launch Outlook.
- In the 'Add a New Account' window that appears, enter the required fields such as your email address and password when prompted and follow the on-screen directions to add your account.
- The computer will now automatically configure the mail server settings for you. After this is complete, click finished.
- The configuration window will close and you can then click OK.
- Outlook will continue launching and will begin pulling in your email, calendar, and contacts.
