

The main CSI Podcasting Studio has a RODECaster Pro recording soundboard with a four microphone set-up. Recordings can be saved to an SD card and/or saved to a laptop.
Laptops loaded with Audacity audio editing software are also available for use in the podcasting studio, and our Surface PC includes access to Adobe's audio editing software, Audition. Staff are available for assistance and training on request.
Our main floor podcasting studios have a two microphone set-up with a RODECaster Pro Duo recording soundboard. The soundboard controls work similarly to the Rodecaster in the CSI. You will need to bring your own laptop or check one out on the fourth floor (Library Technology Services) to use with the main floor studios. None of the studios have cameras, so you will need to bring your own or check one out at Library Technology Services. Only the main podcasting studio in the CSI has a tripod for a camera.
We regularly host a Podcasting 101 workshop that will introduce you to our equipment as well as some tips for getting started. See dates and times here.
The Podcasting Studio (4-microphone setup) and the Podcast Booths (2-microphone setup) can be reserved from the Booth Library Homepage at Space Availability - Booth Library - LibCal - Eastern Illinois University Booth Library
The RODECaster Pro has a variety of functions to produce audio.
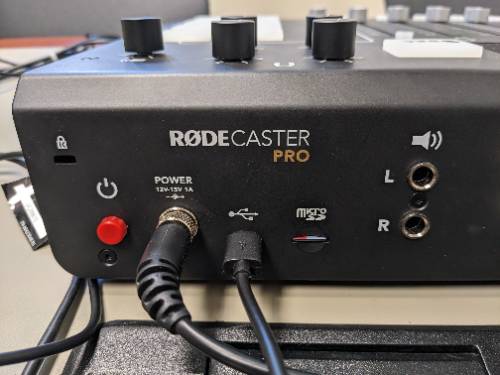
The power button is located on the back of the machine. The green button with REC to the right of the screen records audio to the MicroSD card in the soundboard. The knobs on the far right control the volume output to the headphones and the overall volume.
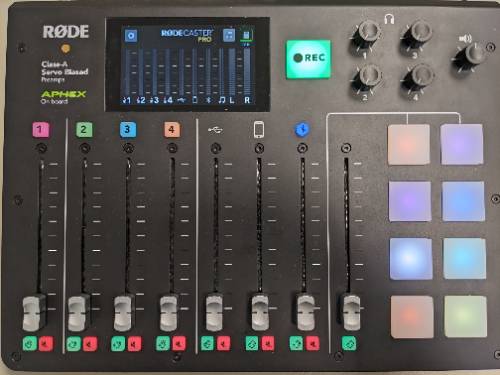
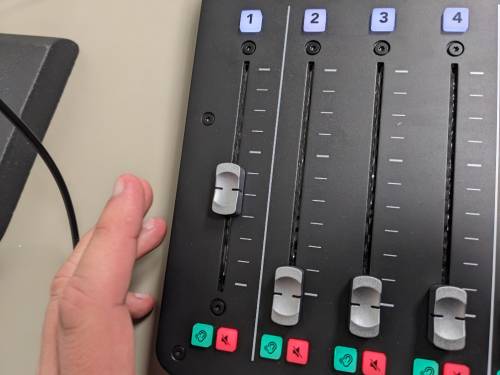
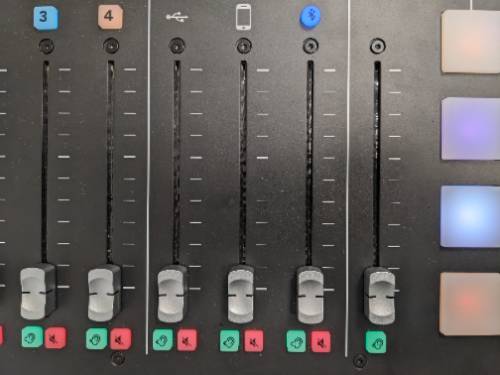
Each microphone has its own volume levels on the board alongside of programmable settings. The microphones are labeled 1, 2, 3, 4 and can be programmed by pressing the corresponding number. The gray knobs are faders and control the volume for each mic, USB output, Bluetooth device, or the colored programmable buttons. The green button mutes all other mics except for the one that you pressed. The red button mutes the mic that is pressed for it.
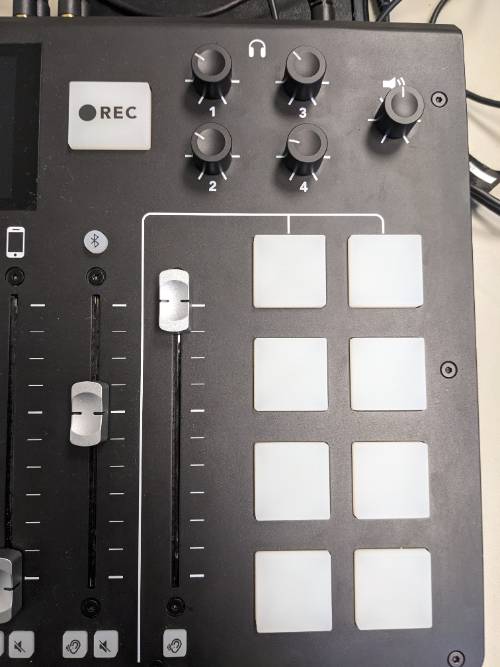
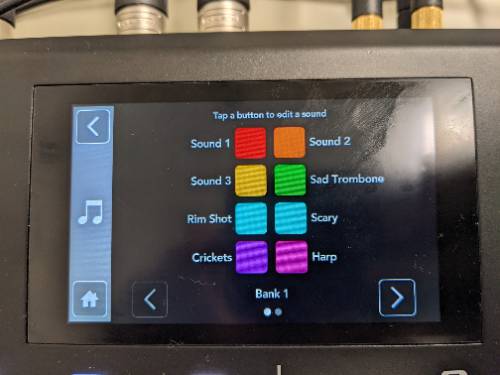
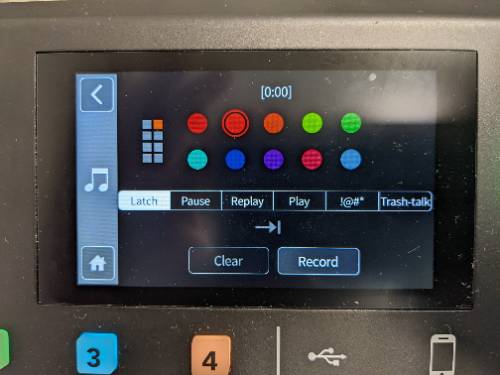
The eight buttons off to the side are programmable where you can record audio and play the sounds whenever you press the button. Press the music icon on the home screen to go to the programmable button screen. You have two banks where to store sounds. Press on the right arrow to go to Bank 2. Press on the screen the square where you want to record the audio. The screen will change to one where you can record the sound. The sound is stored on the MicroSD card in the machine.
RØDECaster Pro | How to Get Started with the RØDECaster Pro | RØDE (rode.com)

The RODECaster Duo is a more compact version of the RODECaster Pro and has the same buttons except for the Rotary Encoder (green lit dial) and the switch bank buttons at the bottom of the programmable buttons.
The Rotary Encoder dial is used for audio editing on the soundboard itself. Select "Depth,""Sparkle," or "Punch" on the channel screen to affect the sound of the channel. Depth adjusts the bass or low end of the signal, Sparkle changes the clarity or detail of a voice, while Punch makes the voice sound more intelligible and reduces the background noise. You change these settings through spinning the Rotary Encoder dial.
The RODECaster Duo has the green only hear this channel and red mute this channel buttons for the mics, bluetooth, programmable buttons, and for the USB output. On the Home Screen, if you press the USB icon and then the ear icon, you can change it so that you only hear what is being output.
RØDECaster Duo | User Guide Home Page | RØDE (rode.com)
The RODECaster Pro and RODECaster Duo soundboards can record audio to a microSD memory card as .WAV files. Library Technology Services on the fourth floor of the library has memory cards/adapters to check out for the soundboards. To record to our Podcast Booth soundboards, insert the memory card into the back of the system here:
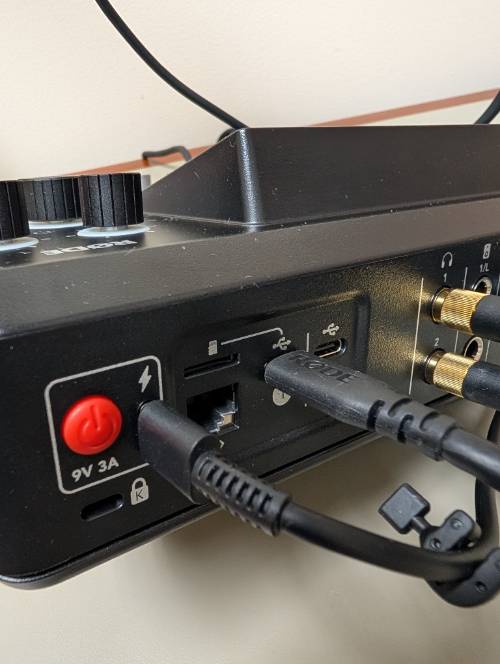
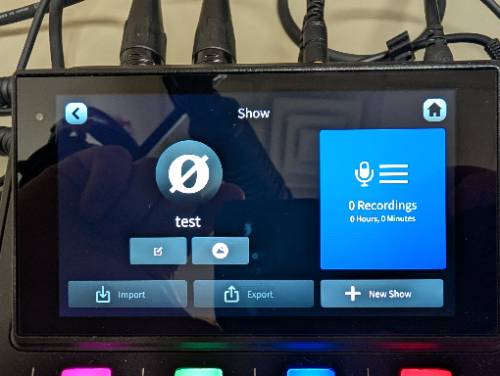
Turn on the soundboard via the red button on the back of the system and the home screen will appear. The record button should turn green to acknowledge that there is a memory card available. To record audio, press the record button and it will turn red. A timer will show where the clock used to be. Press it again to pause recording. To end the recording, press and hold the record button then release. The record button will turn back to green. To listen to your recordings, press on the gear icon in the far right top corner of the home screen. Press the "Show" button and it will take you to where the recordings are. Press the recordings button to see all the recordings on the memory card. You can then press on a recording to listen to it. To save the files, turn off the soundboard and eject the memory card. Insert the memory card into the adapter and then into a computer with an SD memory card slot. Once the memory card is inserted into your computer, upload the files to your Microsoft OneDrive. You can then download the files into a computer and convert them to universally accepted MP3 files through Audacity or Adobe Audition.


To record straight to a computer (Windows operating system only), you need to first download the Asio Driver and then get access to Adobe Creative Cloud. Once you have access, download the Creative Cloud and then Adobe Audition. The Asio Driver only works with Adobe Audition.
Both Audacity and Audition arrange audio into wavelenghths on timelines. They each have record/stop/play buttons in which to record and play audio from the RODECaster Pro.
Audacity Tutorials:
https://manual.audacityteam.org/man/tutorials_for_audacity.html
Adobe Audition has a built in tutorial with videos on how to configure sound.
Basic Configurations in Audacity:
Functions-Import
Functions- Selecting and cutting
Functions- Multi-track
Functions-Noise Reduction
600 Lincoln Avenue,
Charleston, IL 61920
book an appointment
email
(217) 581-6073